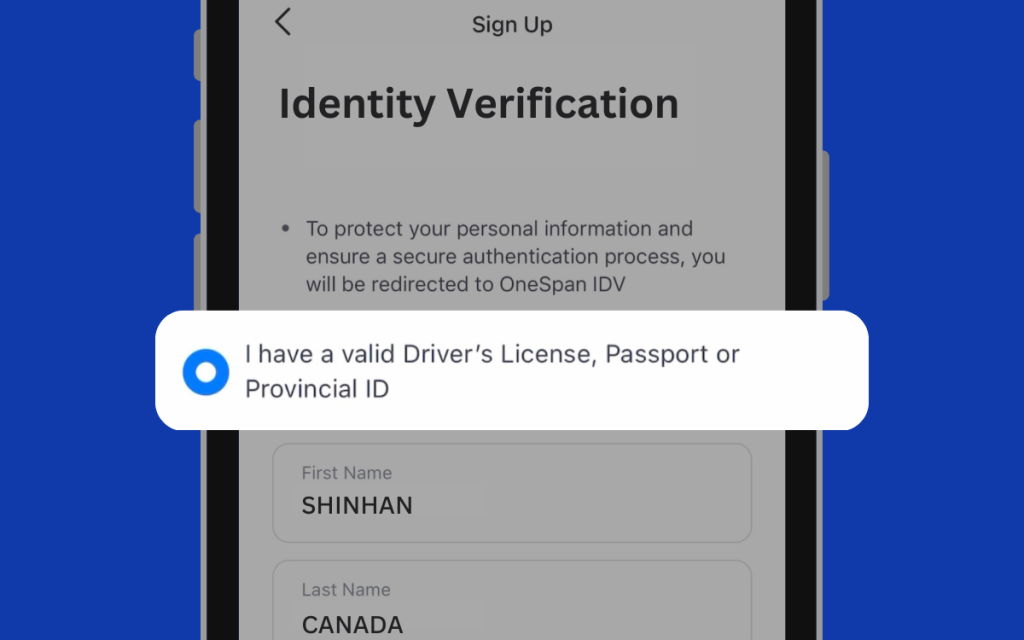
Step 1: If you have a valid driver’s license, passport, or government-issued ID, please check the checkbox and enter your name.
Sign Up - Identity Verification
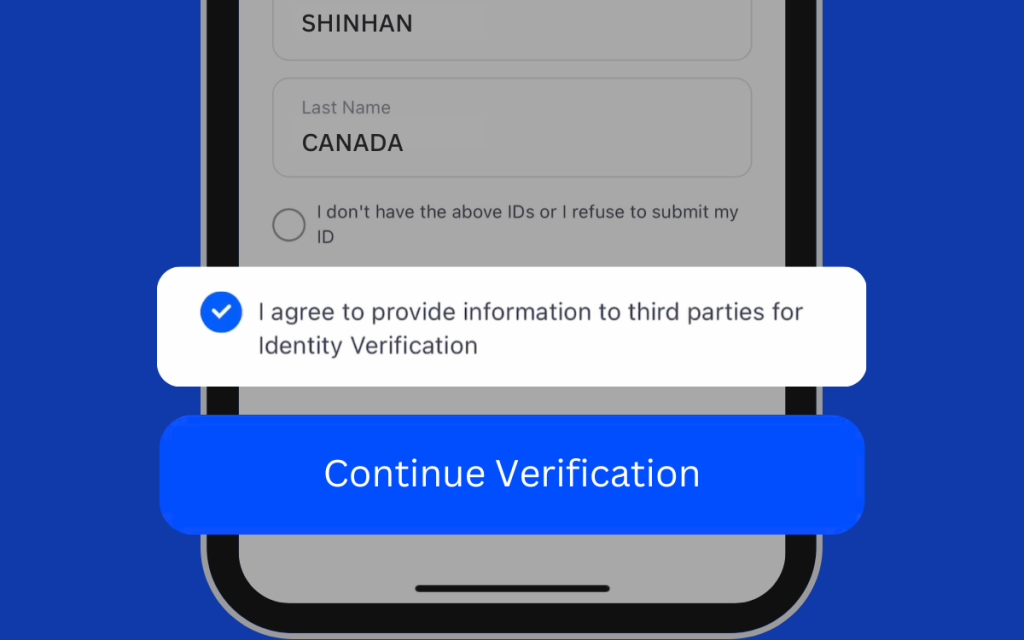
Step 2 :If you agree to share your personal information with the third-party service provider, OneSpan, for identity verification purposes, please check the checkbox and click on the “Continue Verification” button.
Identity Verification
Step 3: Before proceeding with the identity verification process, which consists of four steps, please ensure that you have your ID and a stable internet connection.
Identity Verification
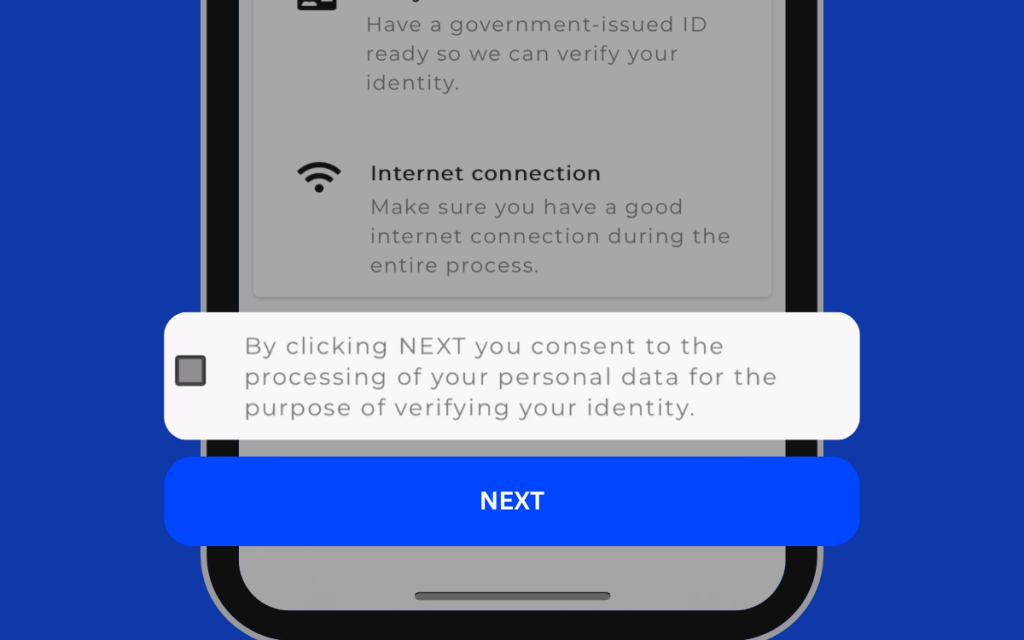
Step 4: Once your ID and internet connection are ready, agree to the personal information verification process for identity confirmation, then click the “Next” button.
Identity Verification Document Options
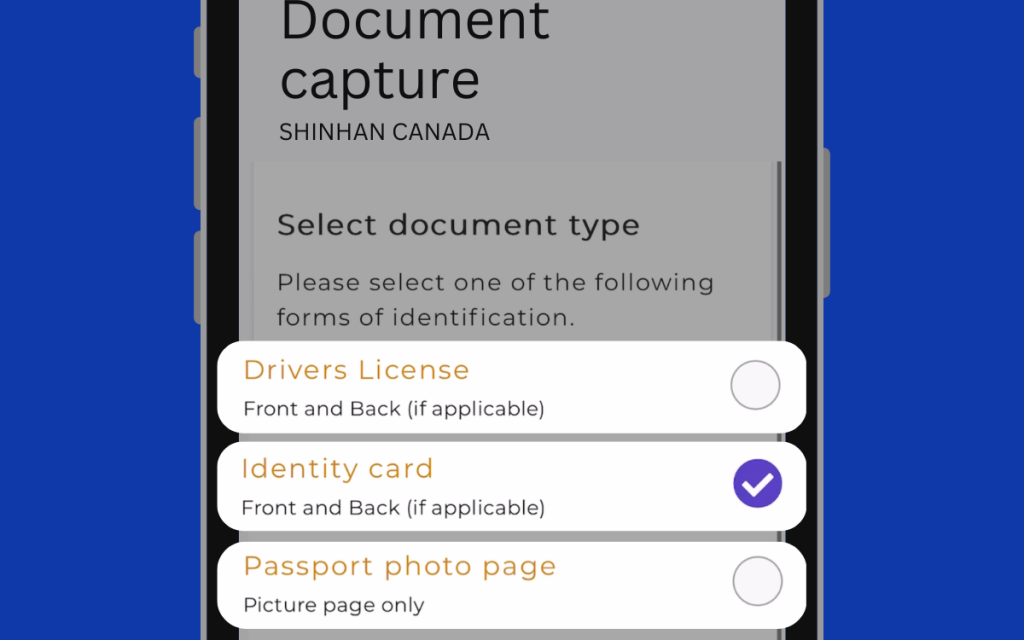
Step 5: Choose one of the three types of identity verification documents (Driver’s License, National ID card (Canadian ID), Passport Photo). The identity verification document must be issued in Canada, and in the case of passports, a Korean passport is considered valid.
Select a Document Issuing Country
Step 6: After selecting the identity verification document, click the “Add” button and set the issuing country accordingly.
Select a Document Issuing Province/State
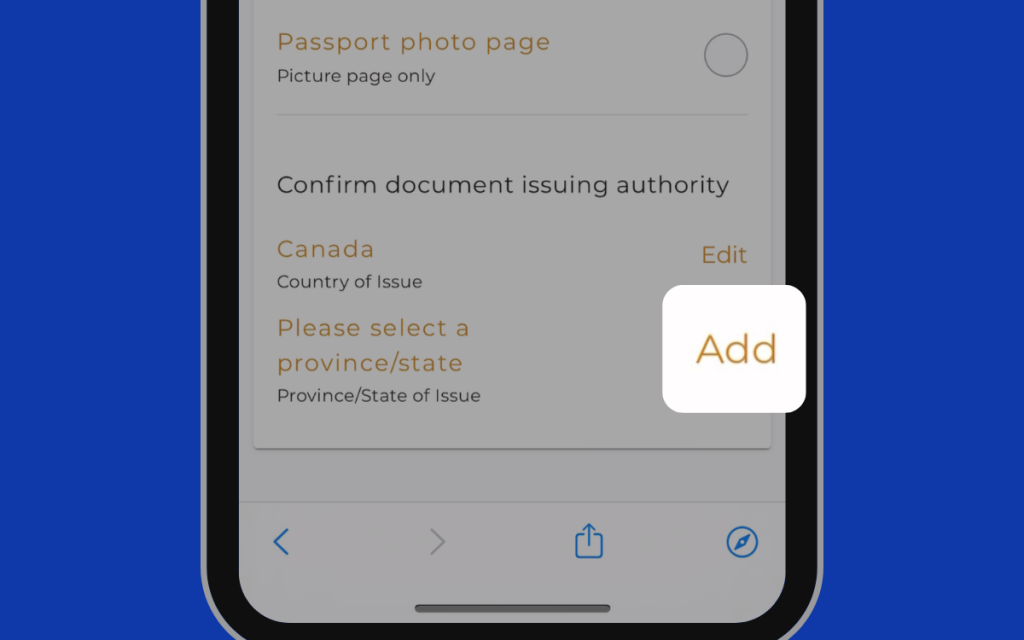
Step 7: After selecting the identity verification document, click the “Add” button and set the issuing state accordingly.
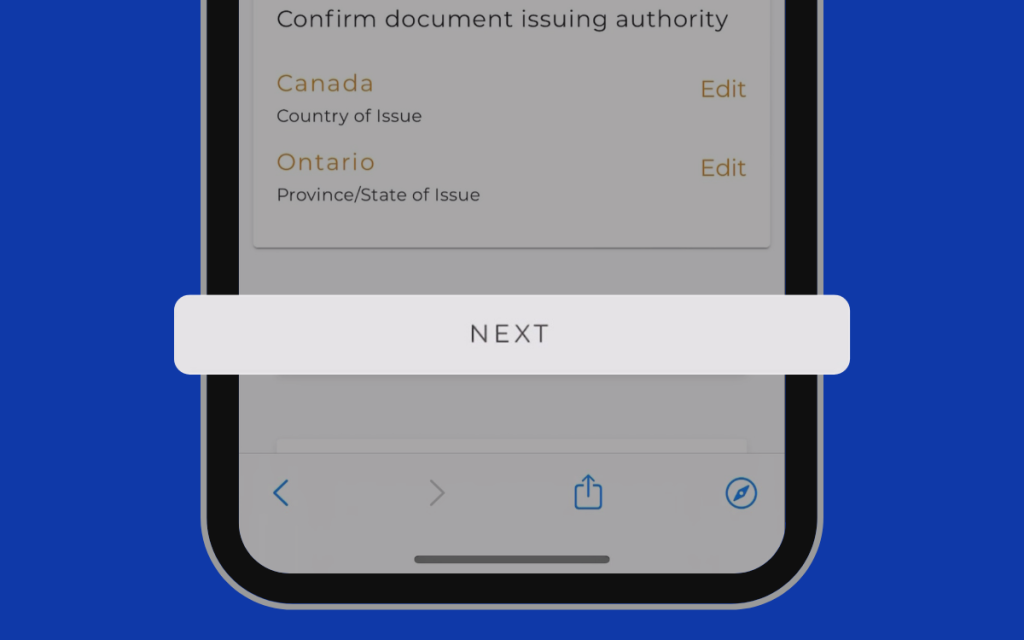
Confirm Document Issuing Authority
Step 8: Once the issuing country and state of the selected identity verification document are correctly set, click the “NEXT” button.
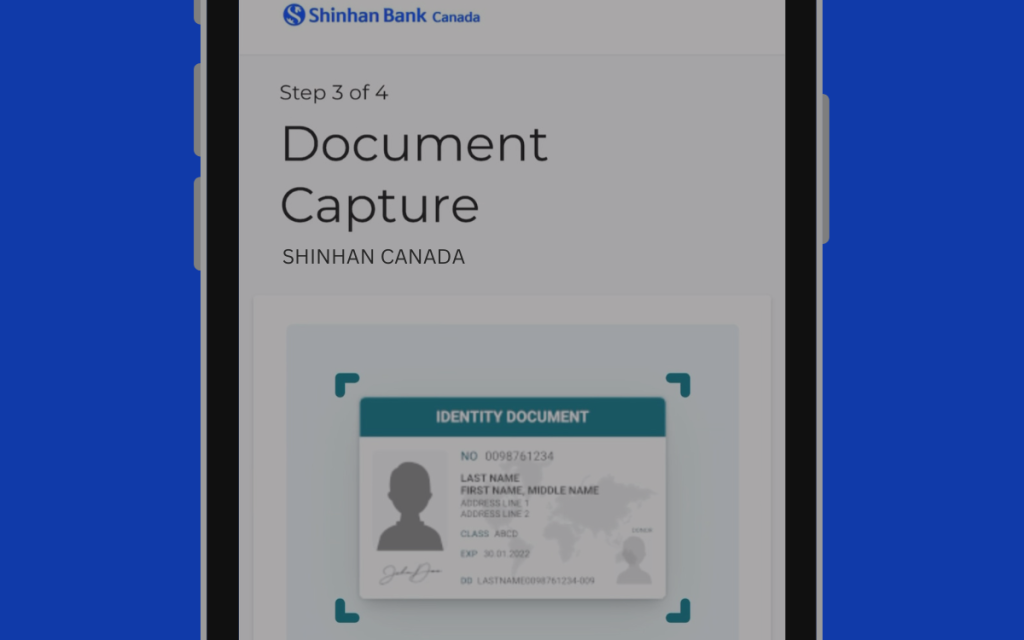
Document Capture and Upload
Step 9: This step involves capturing and uploading the physical copy of your selected identity verification document.
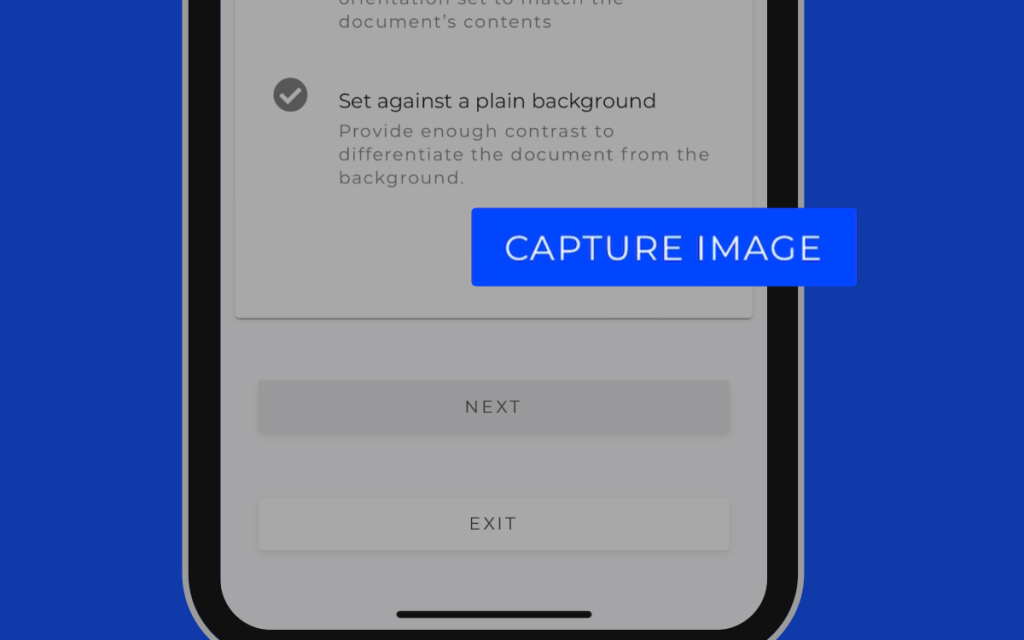
Document Capture and Upload
Step 10: If you are ready to take the photo with a clean background, click the “CAPTURE IMAGE” button.
Document Capture and Upload
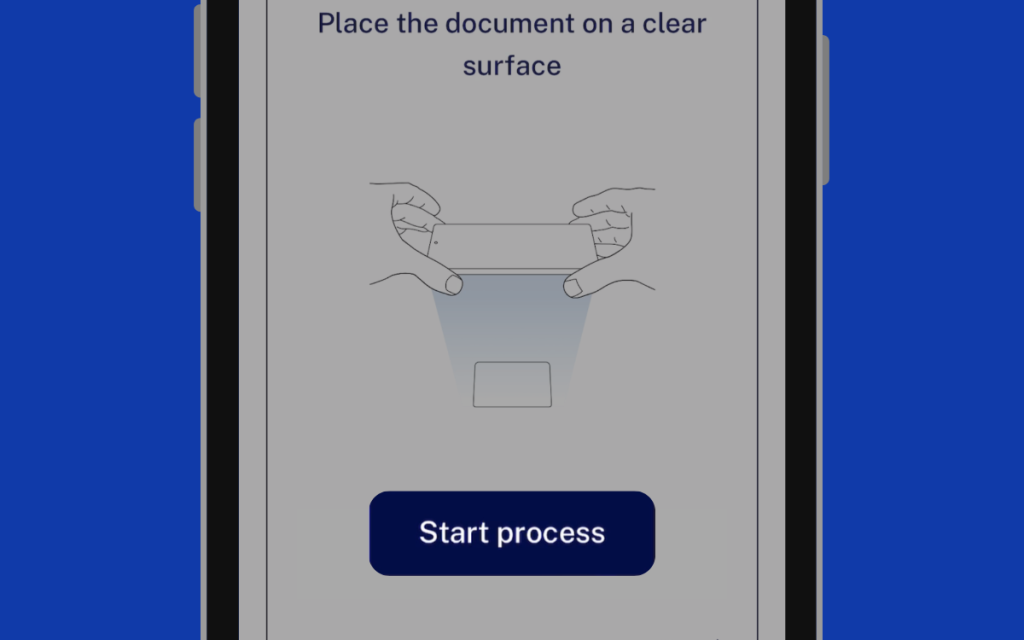
Step 11: For accurate identity verification document capture, place the document on a clear surface and click the “Start Process” button.
Document Capture and Upload
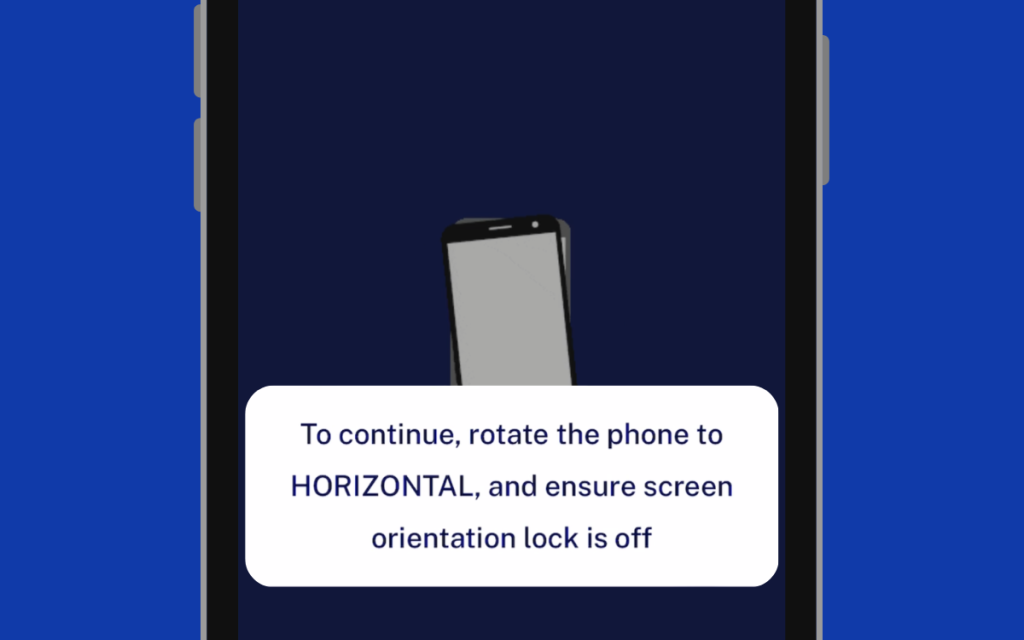
Step 12: To capture the document, rotate your phone to landscape mode. If the landscape mode is locked on your phone, please unlock it before proceeding.
Document Capture and Upload (Front Side)
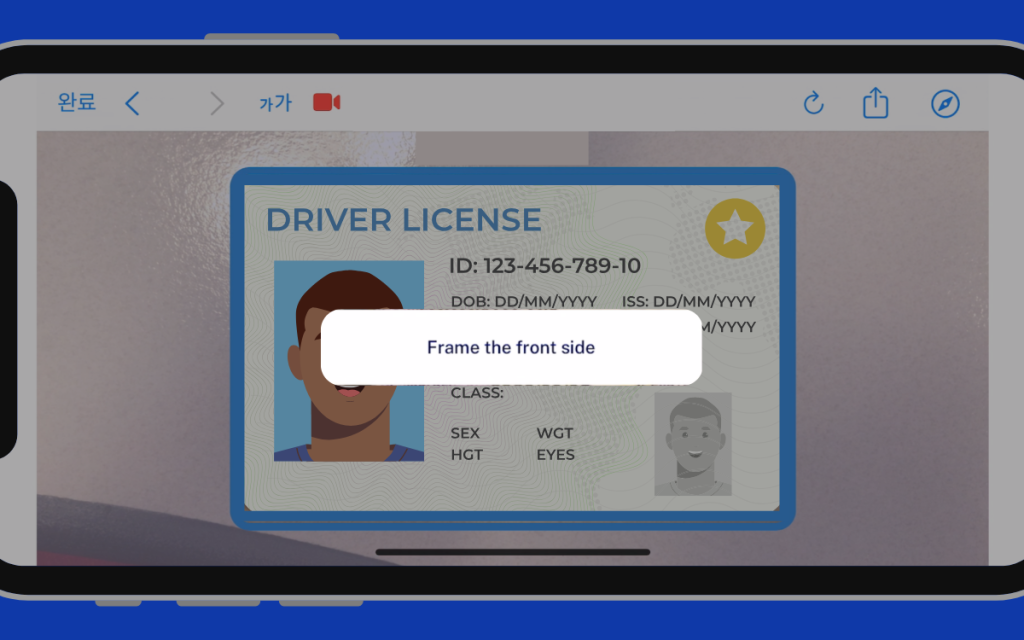
Step 13: While in landscape mode, position the front of the document within the provided frame and capture it. Once the document is properly aligned within the frame, it will be captured automatically.
Document Capture and Upload (Front Side)
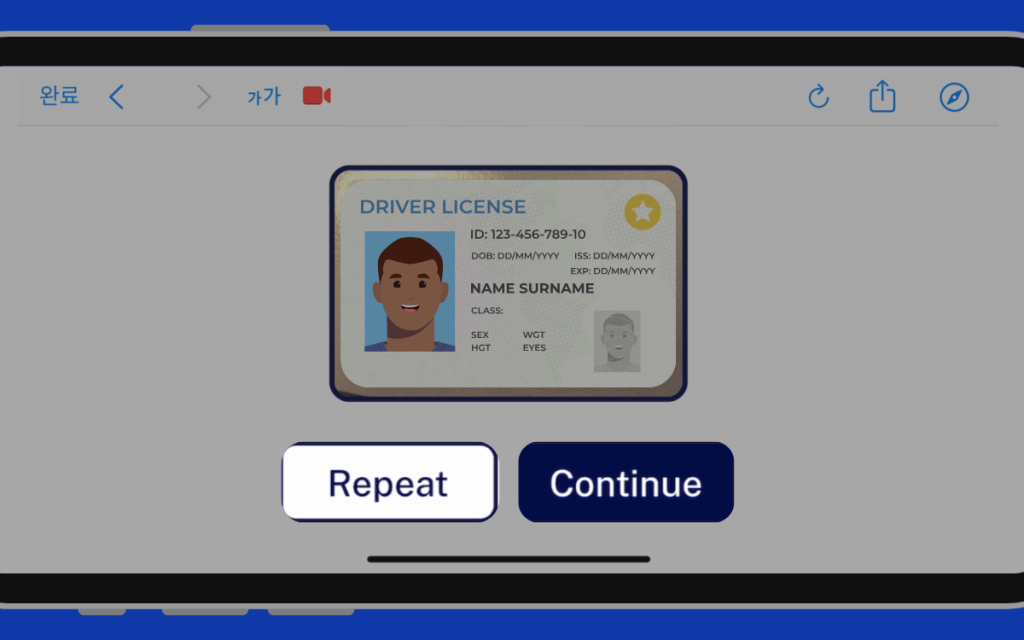
Step 14: Review the captured document, and if it is clear without any glare or cropping, click the “Continue” button. If a retake is needed, click the “Repeat” button to retake the photo.
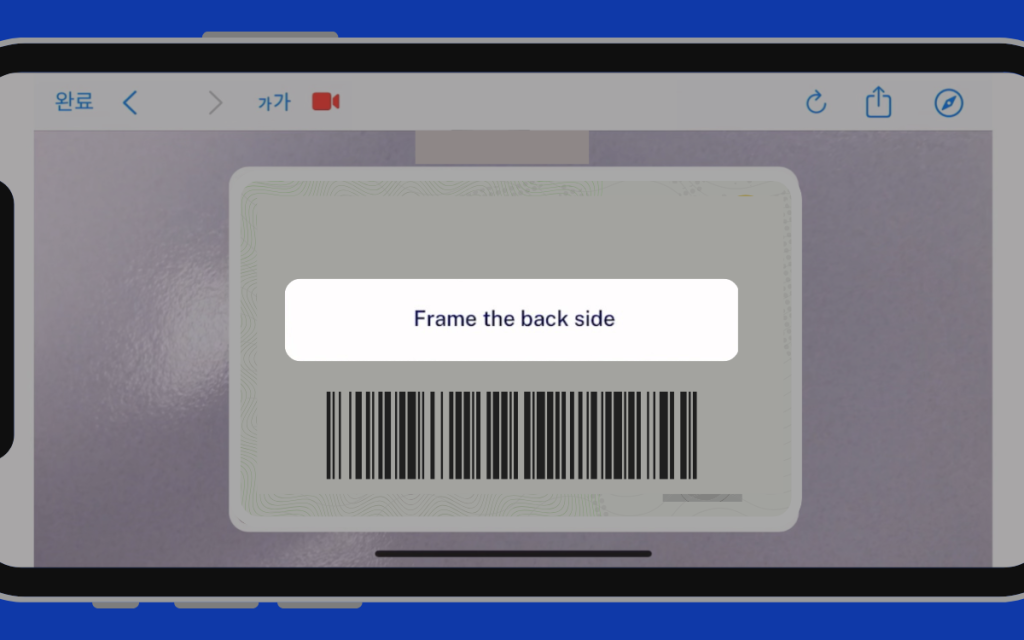
Document Capture and Upload (Back Side)
Step 15: After capturing the front side, follow the same procedure to capture the back side of the document.
Document Capture and Upload (Back Side)
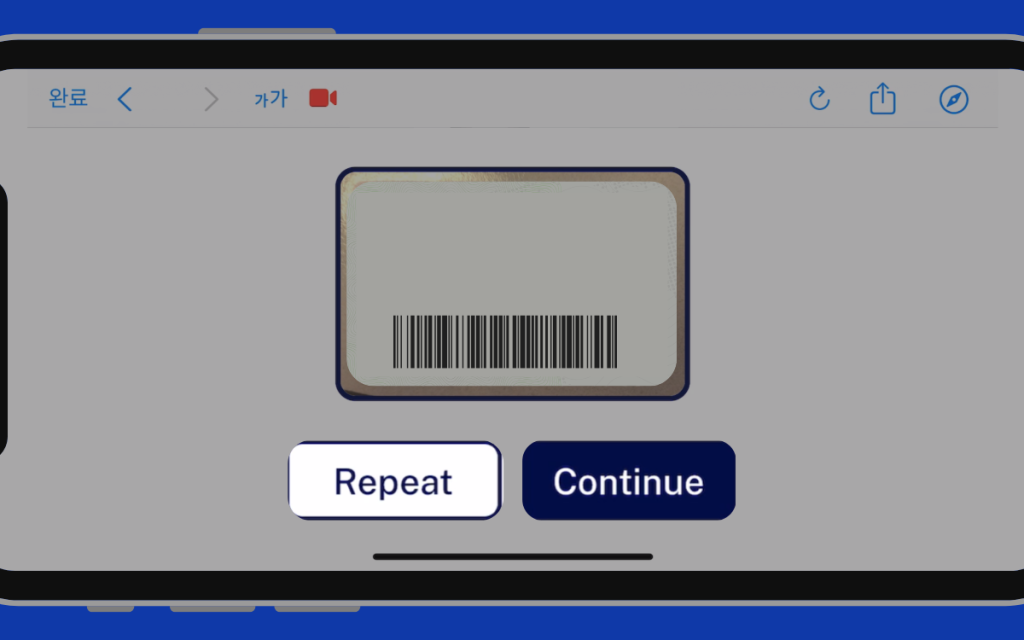
Step 16: Review the captured back side of the document, and if it is clear without any glare or cropping, click the “Continue” button. If a retake is needed, click the “Repeat” button to retake the photo.
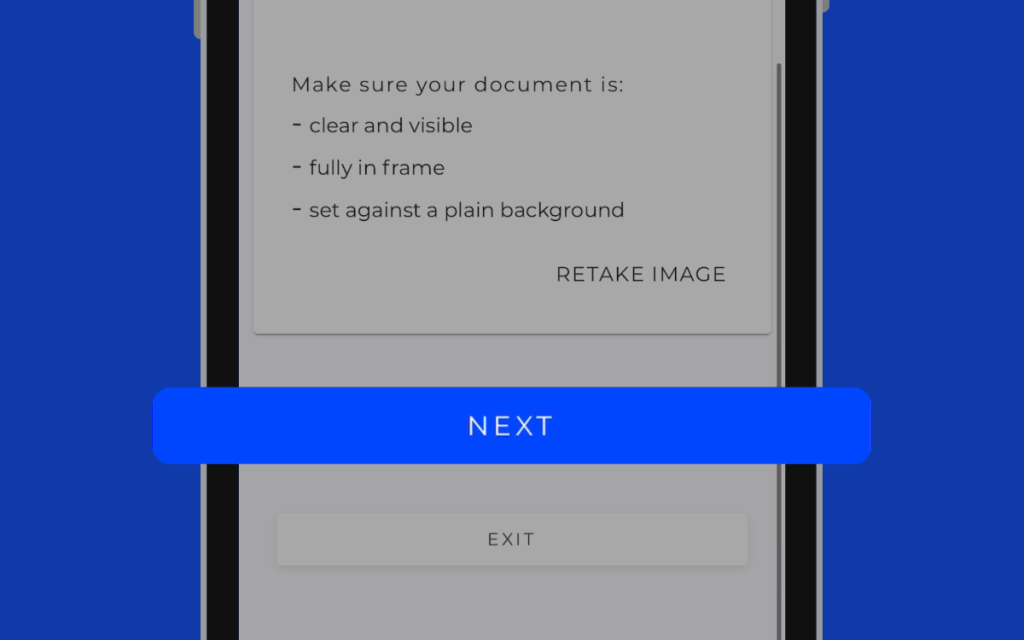
Document Capture and Upload
Step 17: Once both the front and back sides of the document are clearly visible and properly aligned in the frame, click the “NEXT” button.
Identity Verification - Face Capture
Step 18: This is the face verification step to ensure that the submitted identity document matches the registrant.
Identity Verification - Face Capture
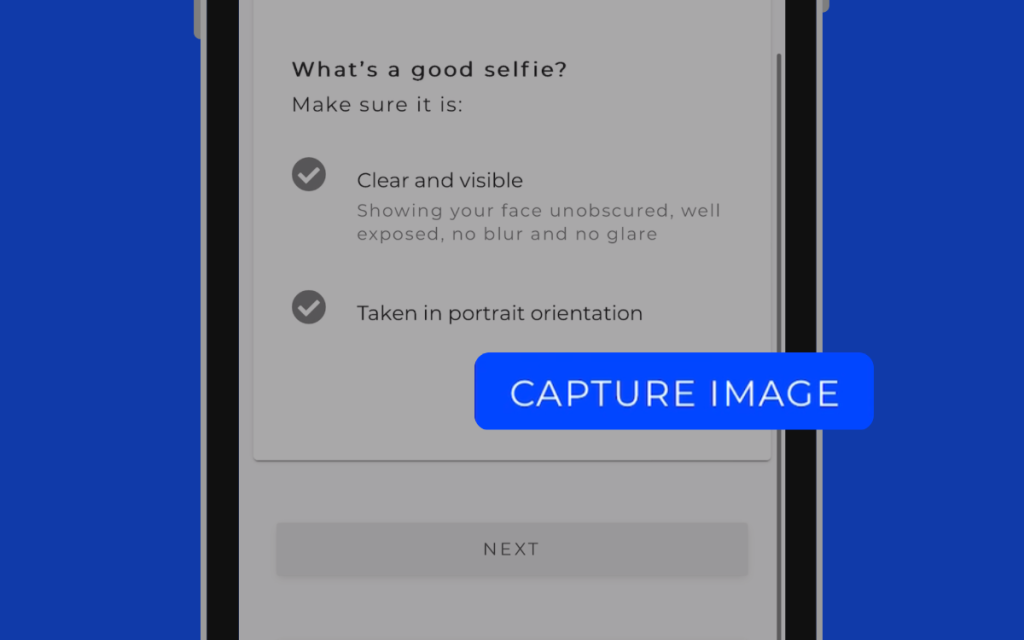
Step 19: Please prepare to take a clear, glare-free, and non-blurry photo of your face. When ready, click the “CAPTURE IMAGE” button.
Identity Verification - Face Capture
Step 20: Follow the on-screen instructions to maintain a neutral expression and then smile. Position your face according to the frame, and the photo will be automatically captured.
Identity Verification - Face Capture
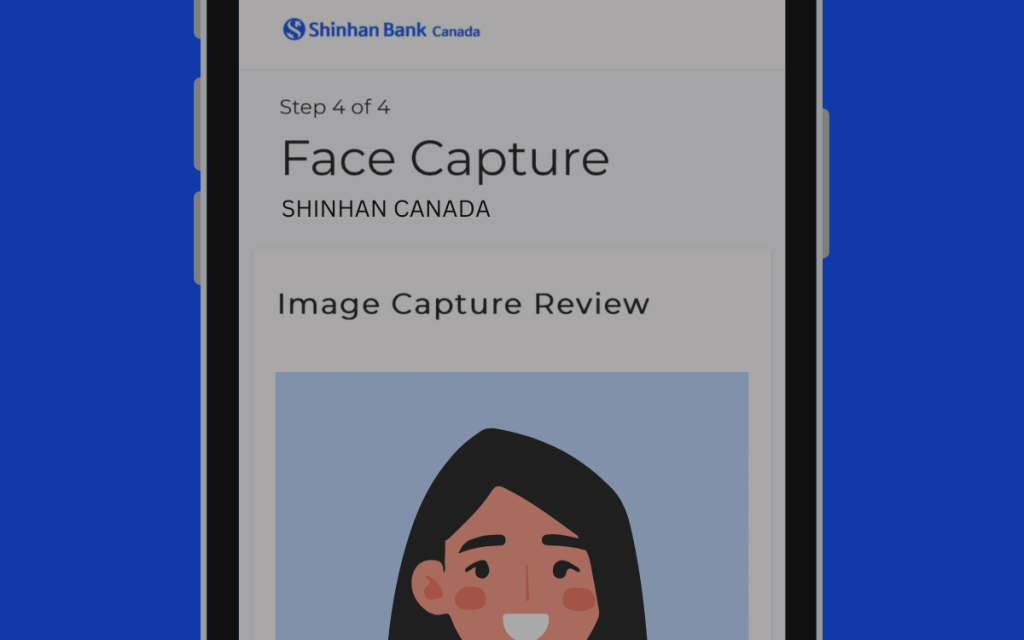
Step 21: Once the capture is complete, you will return to the previous screen, where you can review your face photo.
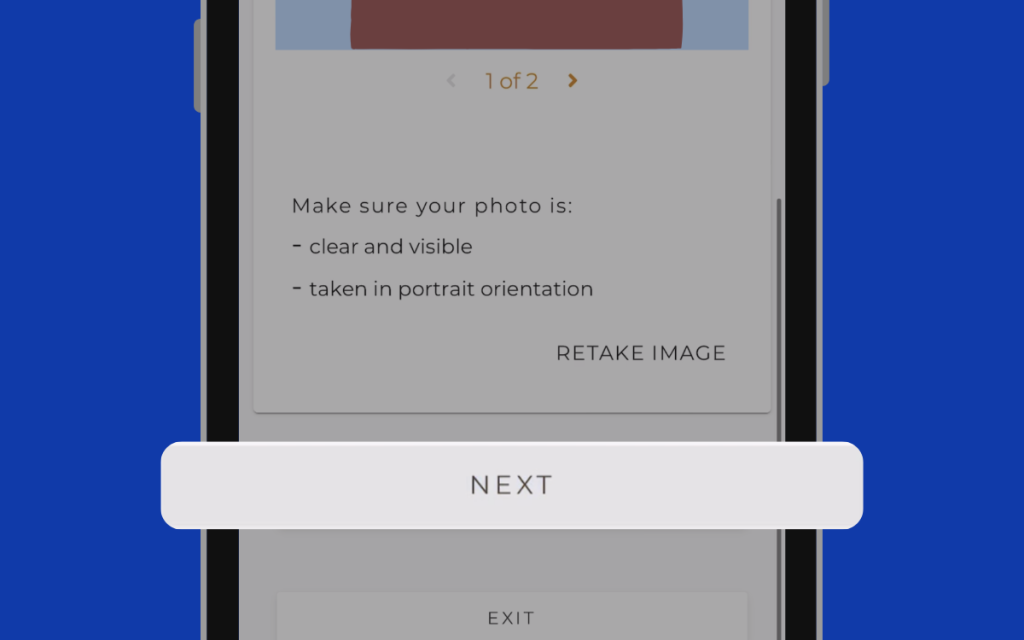
Identity Verification - Face Capture
Step 22: If your face photo is clear, without glare, blur, or cropping, click the “NEXT” button.